How to Grow Lettuce By Following My
Disaster-Proof Tips and Instructions
Understanding how to grow lettuce by knowing their needs will produce great harvests. Lettuce - a plant that everybody has heard of - is popular and apparently straightforward to grow!
|
Sow lettuce seeds in spring and more in early summer, thin out the seedlings and harvest when mature. But there is more to knowing how to grow lettuce than this and treating them so casually will more often than not bring disappointment.
 Lettuce are a vegetable that grow best in cooler climates and there
are many varieties that are ideally suited to the British climate. To
emphasise - this vegetable does not like hot sunny conditions. They also
like lots of rain so keep them moist by watering regularly.
Lettuce are a vegetable that grow best in cooler climates and there
are many varieties that are ideally suited to the British climate. To
emphasise - this vegetable does not like hot sunny conditions. They also
like lots of rain so keep them moist by watering regularly.Pests and diseases will also have an effect, they may not be killed off but they will be severely reduced in vigour. If you sow lettuce seed all at once the plants will mature all at the same time and you will have approximately one week to pick them before they begin going to seed.
Lastly - a main reason for failure when learning how to grow lettuce is that they are not grown quickly enough, the leaves become tough and leathery. It is important to ensure that the soil has adequate humous incorporated - thats organic content to you and me. The soil must also be kept moist - golly am I repeating myself - you betcha.
It is not quite as easy as some books make out but pick the right varieties, purchase a few cloches and follow the tips and instructions on this page, you can enjoy the fruits of your newly aquired knowledge on how to grow lettuce.
|
|
|
Cos Varieties
Lobjoit`s Green Paris White Little Gem Winter Density |
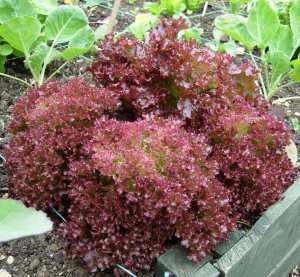
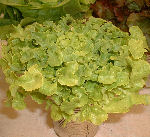
Looseleaf Varieties
Salad Bowl Lollo Rossa |

|

|
|
Crisphead Varieties
Webbs Wonderful Wndermere Avoncrisp Lakeland |
Butterhead Varieties
All The Year Round Tom Thumb Winter Crop Dolly |
How to Grow Lettuce - Soil Details
Ideally, lettuce plants require a rich, humous-laden soil that will hold moisture in the summer. They may require the soil to have lime added as a soil pH of 6.5 is just right - test your soil - but don`t be too rigid. Quite often though, lettuce is grown between rows of slower growing plants like brussel sprouts or broccoli etc. This is called a `catch crop`. Yep, here is another reminder, water is a vital ingredient so keep the soil moist at all times.
Lettuce plants do not like hot sunny conditions, a good tip when learning how to
 grow lettuce properly is to choose a lightly shaded site for your summer varieties.
Dig the soil and apply compost during the autumn or early winter. A
week or so before sowing your lettuce seeds rake the soil over to
produce a fine tilth and apply a general fertiliser like Growmore.
grow lettuce properly is to choose a lightly shaded site for your summer varieties.
Dig the soil and apply compost during the autumn or early winter. A
week or so before sowing your lettuce seeds rake the soil over to
produce a fine tilth and apply a general fertiliser like Growmore.
Sow spring lettuce seeds into a sunny site outdoors if you live
in a mild area. It may not be nescesary to give glass protection
(cloche). (Just experiment - vegetable growing expertise increases
dramatically only when you start to "do it".)
The possibility of failure increases the more the ground becomes poorly drained or over exposed - spring lettuce is hardest to get right... who said learning how to grow lettuce successfully was easy.
The possibility of failure increases the more the ground becomes poorly drained or over exposed - spring lettuce is hardest to get right... who said learning how to grow lettuce successfully was easy.
How to Grow Lettuce - Sowing Seed
Many books will advise you that lettuce seed can be sown into seed boxes or beds and the seedlings transplanted about a month later when they are about 2.5cm(1") high.
For best results this is how to grow lettuce ...lettuce plants hate being moved so always sow seed directly into the position they are going to remain, and sow them very thinly - thinning out the seedlings when the first true leaves
 appear and avoiding overcrowding at all costs.
Allow the remaining seedlings to grow to maturity without disturbance. (You can try transplanting the thinnings but why waste your time when lettuce seed is so cheap).
Sow lettuce seed into beds very thinly (What! I`ve said that before - noooo :0]) into drills 13mm(½") deep with the rows 30cm(12") apart. Thin them out to 15cm(6")-30cm(12") apart depending on the variety.
For growing lettuce under glass or on a window sill for transplanting, sow a couple of seeds into a peat pot. When the seeds have germinated remove the weaker seedling, harden off then plant the whole pot along with the young lettuce seedling into its final position and the roots won`t be disturbed.
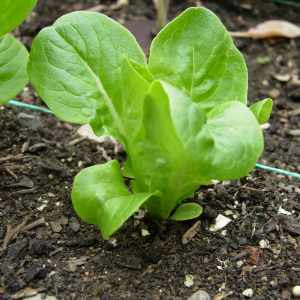
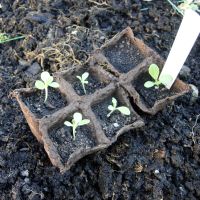
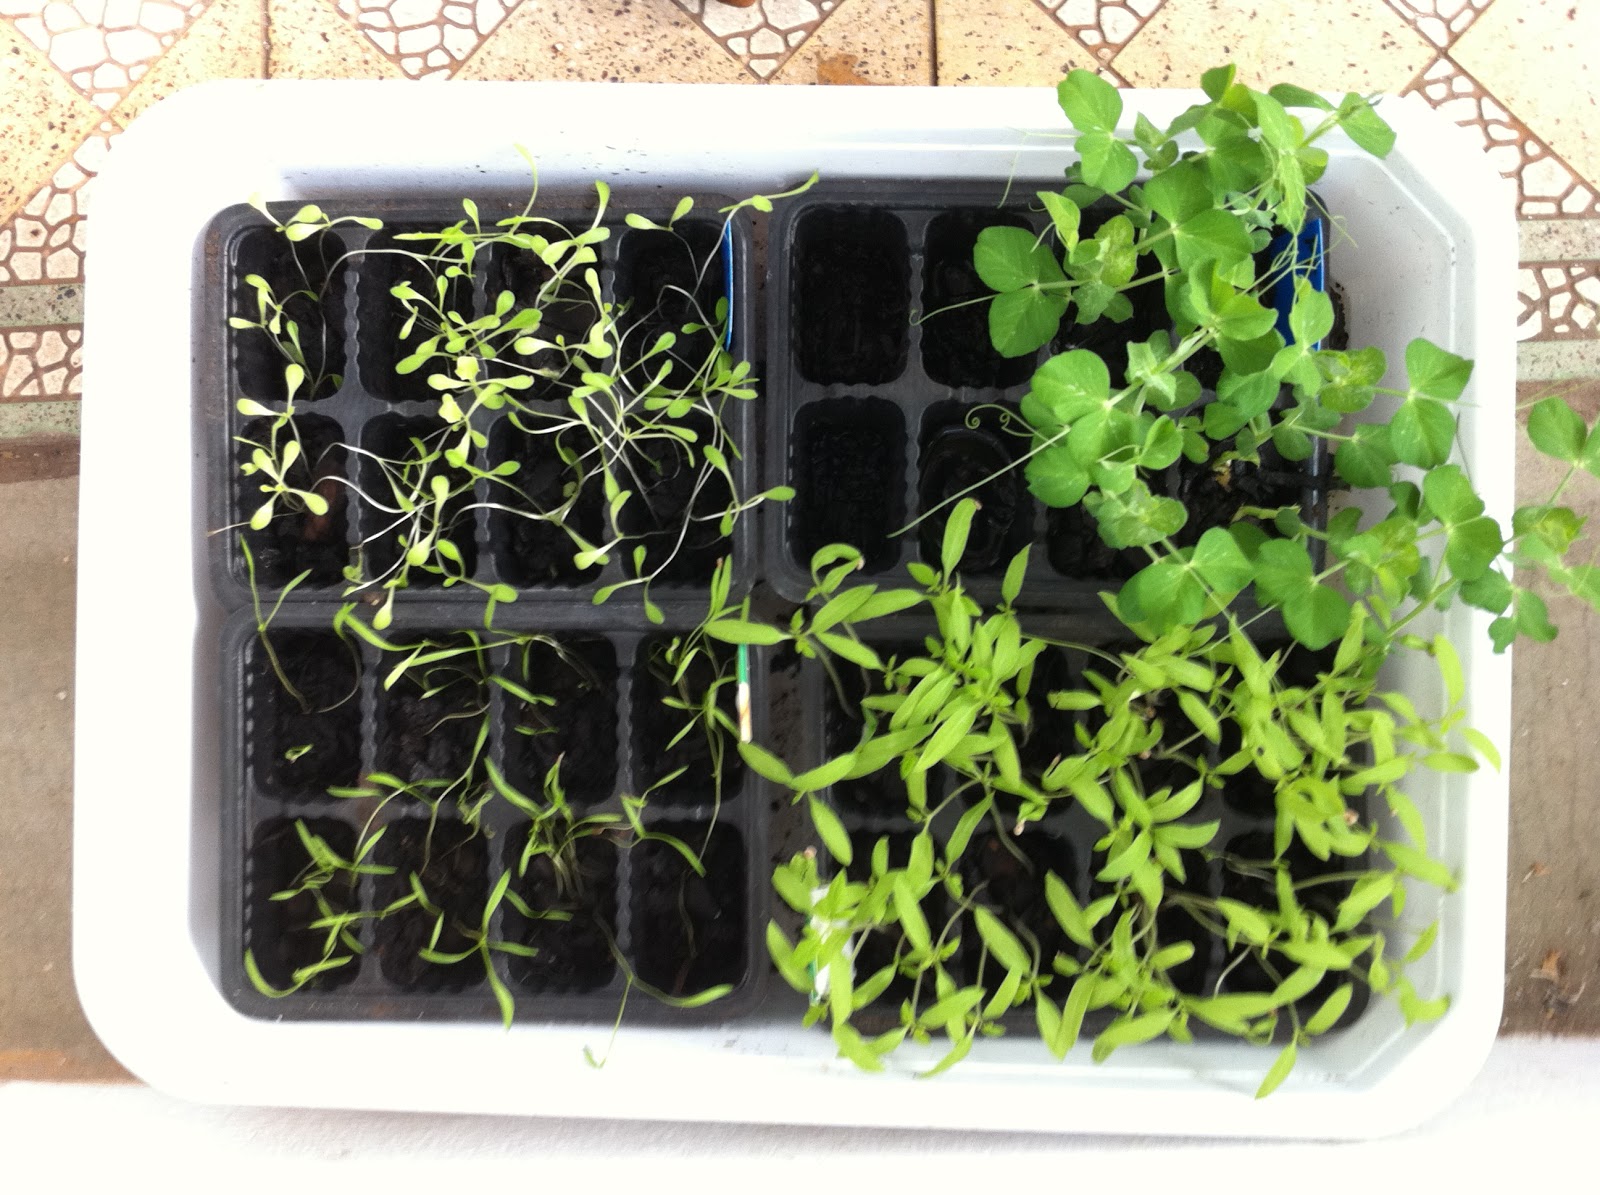
The picture to the right shows how to grow lettuce seedlings (Winter Density) whose seed were sown at the begining of February(2008). After sowing they were placed in my heated propagator in the greenhouse until they germinated.
I only returned them to the propagator on frosty nights. In fact they coped on the bench in my greenhouse in air temperatures down to -8°C. I will transplant the lettuce with the peat pot straight into my greenhouse border.
A useful tip for learning how to grow lettuce the 'recycling way' is to follow the instuctions in the previous paragraphs but instead of purchasing peat pots use an egg box (it has to be a cardboard type box) and fill the cells where the eggs sat with peat. Keep the peat moist and when the seedling is ready plant each individual cell into its growing position.
You can use the egg box method for sowing other seed types. Fill the flat side with peat sow your seed into it covering
 them lightly with a little more peat. Water and shut the egg box by
putting the cell part on top until the first signs of germination then
leave the lid open.
them lightly with a little more peat. Water and shut the egg box by
putting the cell part on top until the first signs of germination then
leave the lid open.Once the seedlings are big enough - when the true leaves appear and are able to be handled - transplant the seedlings into the peat filled cells to grow on and harden-off ready for planting into their final position, egg box cell and all.
This is best suited for growing vegetables that don`t mind being transplanted or benifit from it. Eg. cabbage, brussels sprouts, broccoli etc.
To ensure a steady supply of lettuce and to avoid a glut (unless of course you are a glutton) sow little and often - every two weeks - the amount will depend on your needs.
How to Grow Lettuce - Hardening Off
This is a piece of - how to grow lettuce jargon - actually it applies to any seed you sow. Here is a quick description of what `Hardening Off` is.
This process is not only relevent in knowing how to grow lettuce correctly. It is the process of preparing all seedlings which have been grown under glass for outdoors. Initially ventilation is increased and then seedlings can be moved into cold frames.
Keep the cold frame lids (or lights) closed for a couple of weeks then begin opening them on dry frost free days and shutting at night. After a further week or when frost is not expected to be a problem leave the lids open for five days and nights before planting out.
Seedlings that have been grown on a window sill in a heated room should be moved to an unheated room and then stood outside for a couple of days prior to planting out.
If your just learning how to grow lettuce this may seem a bit tedious but you are learning a new skill which when done long enough will become second nature and you won`t notice it annnnnd - yes I will say it again ;0).... experiment because thats how you will determine what is best in your `micro climate`.
| Expected germination time | |
| Life expectancy of stored seed | |
| Approx time between sowing and harvesting | 6-8wks (Looseleaf Varieties) |
| Cultivation facts |
How to Grow Lettuce - Caring For Your Plants
When your seedlings are tall enough they are ready to be thinned out. You must avoid overcrowding. Water your plants the day before thinning and then continue to thin out in stages until your lettuce plants are at the required distances recommended for your variety.
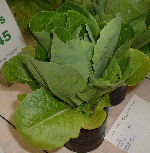
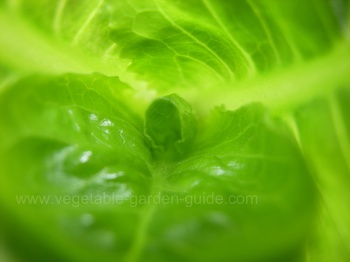
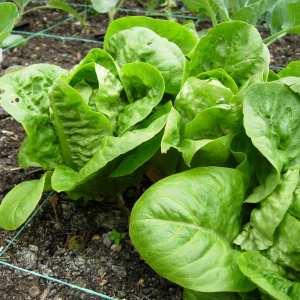
This adjacent picture is a look into the delicate heart of a young Winter Density lettuce plant. The differing shades of green are fresh and enticing with the outside ambient light seen gently permeating its way through the thin translucent leaves. I took this photo to show how easy the plant could be damaged at this stage.
 I have had a lot of success with shop bought variaties but when transplanting make sure that the lower leaves are not buried.
My success here is probably put down to the fact that these shop bought lettuce have a vigorous root system already established and so the root ball tends to stay together when transplanted.
But as I said earlier - whenever you can, sow lettuce seed where the crop will grow to maturity. How to grow lettuce to get the best out of them needs just a little attention to detail and you will be fine - you will pick great crops at harvest.
Protect your lettuce seedlings from slugs and birds (see pest control below). Hoe regularly to keep weeds down. Remove rubbish from around plants - this can harbour pests like slugs and snails. Water regularly to keep the soil moist - this is important - but less so for plants grown in soil under glass, keep it a bit dryer to stop fungus diseases taking hold, keep ventilated.
Watering in the evening increases the risk of diseases so water in the morning or midday.
How to Grow Lettuce - Pest Control
As I have indicated above lettuce is an easy crop to grow, but not necessarily easy to grow well - this is why I have said give just a little attention to some details and you will become a master at knowing how to grow lettuce plants.
Protecting against soil pests, slugs and birds is important to knowing how to grow lettuce successfully. Equally important is to prevent any check to the lettuce plants growth.
Cool, damp weather encourages the two major diseases of downy mildew and grey mould to become active and very destructive.
Good preparation and aftercare will help keep these pests and diseases to the minimum. Don`t despair and think there is too much working against us - after all there always seems an abundance of these tasty plants to go round each year.
Downy Mildew - large yellowish patches appear between the veins of older leaves. Whitish mouldy areas develop on the underside of the leaves. Diseased patches eventually turn brown and die. Worst in cool, wet conditions.
Treat by:
- removing affected leaves as soon as the disease is observed. Spray the lettuce plants with Dithane - from any good garden centre.
Grey Mould - plants become infected through dead or damaged areas. The fungus produces a redish brown rot when it reaches the stem, causing the plant to wilt and even break off at soil level.
Masses of grey mould are produced at the point of infection. The disease is encouraged by low temperatures and high humidity. On outdoor lettuce, grey mold is a common problem in the spring and autumn when weather conditions are often favorable to it.
Treat by:
- being careful to avoid wounding the plant during hoeing.
- reducing the duration of leaf wetness - water in the morning or midday (not at night).
- using wide spacing within the row - especially at susceptible times of the year - spring and autumn.
- controlling weeds.
- minimising crop debris around the beds at time of planting.
- use of raised beds.
- use crop rotation methods.
Root Aphid - greyish coloured aphids colonise the roots and become covered with white powdery patches. A yellowing of the leaves may occur and the plant will be stunted and wilt - disheartening if your only just learning how to grow lettuce. These attacks are worst in late summer.
Treat by:
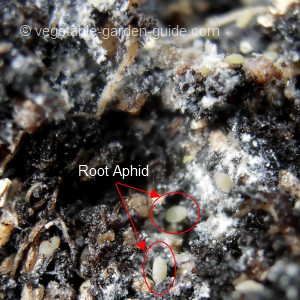
- pulling up and destroying affected plants. Don`t put them on the compost heap. There are sprays that can be used but chat with your garden centre team for what is safe and effective.
There have been trials using barriers against these type of pests which have shown promise.
By barriers I mean such things as horticultural fleece - a very thin white covering that can be draped over your crops. It allows water and light through but keeps out the baddies.
Anything that reduces the use of chemical sprays has to be good but the one drawback for me about using barrier type protection is that you don`t get see your plants growing in the same way.
When I learned how to grow lettuce and other vegetables this was all part of the excitement - but we are engaged in a war ;0).
Remember... prevention is better than cure (which is not always available), keep plants well watered during dry weather - water in the morning or midday (not at night). If attacks happen again try using resistant varieties.
Greenfly - a good understanding of how to grow lettuce must include greenfly as they not only affect the growing of lettuce but many other plants too. They spread mosaic virus (stunts plant growth) and cover the plants in an unsightly sticky honeydew (excreted by the green fly) which makes the lettuce plant unusable. Attacks are worst in a dry spring, the leaves may become badly distorted.
Treat by:
- using fleece as a barrier or spray at the first signs of attack.
Slugs - can also be a problem and can be dealt with using a combination of different methods. These slug pest control pointers are not only relevant in how to grow lettuce but for all the vegetable growing you will be doing!
Treat by:
- going into your vegetable garden at night with a torch and collect the slugs by hand - they can be disposed of by placing in a box containing salt.
- place barriers around the plants... something rough that makes it difficult for them to slither on - like egg shells or sand. Or cover your seedlings with plastic bottles with both ends cut off and pressed into the soil over them.
- nematodes are a very effective way to kill slugs without harming people or wildlife and is becoming a popular method of control. Nematodes are naturally occuring organisms which can`t be seen by the human eye. Sold in packets - purchase them at garden centre or nursery, place the the contents as directed into a watering can, add water then apply to your vegetable garden. These little darlings then enter the slugs and kill them. They go on being effective in the soil for about six weeks.
- slug pellets are effective but need to be used sparingly as they can be a danger to wildlife because the chemicals metaldehyde or methiocarb they contain. There are wildlife friendly pellets around these days.
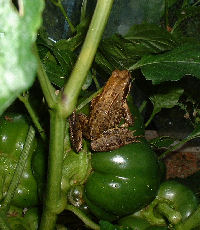
- I live next to a small stream so I am blessed with lots of frogs in my vegetable beds - they love slugs. Encourage beneficial wildlife around your veg patch - for example, purchase a purpose built hedgehog home. This all increases the enjoyment of your vegetable growing experience.
Bolting - Lettuce plants produce thick flowering stems if not picked after their hearts have formed (you have about 5-7 days max). Follow these tips how to grow lettuce and you should be ok.
One cause is a check in their growth at some stage in its life. Careless transplanting or transplanting too late maybe one cause (remember they don`t like having their roots disturbed).
Letting the lettuce plants get too dry or become too overcrowded could be another.
Best to plant into ground where they can stay undisturbed (am I repeating myself - sorry ;0]) or sow into peat pots or egg boxes under glass.(See `Useful Tip` above).
Any `bolted` plants can be pulled up and put on the compost heap - cover so aphids won`t be attracted to them.
Birds - it goes without saying that birds are to be encouraged to populate your garden. One reason is that many varieties actively eat pests, a main reason though is that they just bring life, colour and joy into our lives.
 There are a few species, however, that are a serious nuisance to
seeds, seedlings and mature crops. Two that come to mind are sparrows
and wood pigeons.
There are a few species, however, that are a serious nuisance to
seeds, seedlings and mature crops. Two that come to mind are sparrows
and wood pigeons.Whilst you might be tempted to go for your air rifle remember - learning how to grow lettuce and other vegetables means learning how to compromise - you can do all you can to protect your plants but if a few get nibbled don`t fret it.
Use fleece or netting to minimise problems if these birds come-a-calling.
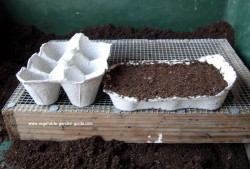
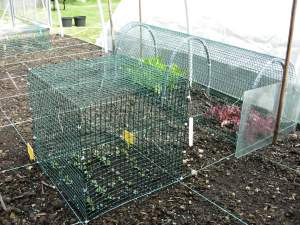
The photo on the right pictures some plastic coated wire mesh cloches I created. They are dead easy to make so when I get time I will post an explanation how I made them. The only material I needed was the 13mm(½") wire mesh, short cable ties and some poly pipe if you want to make arched cloches. They are very flexible as you can also cover them with fleece, shading or polythene sheet.
General precautions:
- keep bed weeded
- remove the stumps from harvested lettuce plants - attractive to aphids
- remove decaying plant debris from bed
How to Grow Lettuce - Harvesting
As soon as the heart has formed the lettuce plant is ready for cutting. Check for firmness by gently pressing down on the top of the heart area with the back of your hand. This is the safest way as squeezing may damage plant tissue and if the
 plant is not ready to pick some horrible diseases may enter, as discussed above.
If the plant is ready and left in the ground too long (5-7 days) the heart will start to grow upwards - a sure sign it is begining to bolt. Cut them immediately for use or dig up and compost.
When cutting for use it is best to lift the whole plant, cut off the root and lower leaves, placing them on your compost heap - don`t leave on the bed to attract pests and diseases.
You should now be holding a delicious looking lettuce plant of some variety. This is the end game - after applying your knowledge of how to grow lettuce you can now go and enjoy with pride the very real fruits of your labour, there are not many thrills greater than this.
Bon appertite.
 |
This is me and my greenhouse buddy - Freddie Frog signing off. We`ll be back updating and adding more pages so don`t forget to `contact us` and let us know what you would like adding to the site. Don`t forget to visit the other pages too. |


